Thursday 14 November 2013

Vintage Haberdashery

This interesting vintage haberdashery / tool set was given to me recently.  It is in great condition and has strange needles and implements (upholstery? Leatherwork?)


I can identify what I think is a button hook but there are many mystery items.  Any ideas?

This belonged to my friend's grandmother and she kept it for many years.  What a great present.  

Tuesday 12 November 2013

Red Geese

Red is not my favourite colour and you won't see a lot of red on this blog. But I love red and white in a quilt.  I'm also fond of the traditional flying geese pattern.  Fabadashery's red and white Nearly Insane Quilt has been fun to follow, and I enjoyed reading the saga of her Red and White pinwheel quilt which, I am pleased to say, had a happy ending. 

Although no one around here actually "needs" another quilt,  a visit to my local quilt shop tipped me over the edge.  I came back with 8 fat quarters in reds, cream and white.


Cutting and piecing has commenced.  I am using the "no waste" method of making four flying geese at once.  I would love to meet the genius who came up with this idea. 

My geese finish at 5 inches by 2.5 inches so a useful size quilt will need 15 columns and about 25 rows. Does that really make 375 flying geese?  That's a lot of geese to make and trim. I might make is smaller.  But the cats don't need another quilt either.


Next, to consider layout. There seem to be about a million options.  Well, there will be time to think about that while making 375 geese....

Friday 1 November 2013

H quilt for Harriet

I have been knitting hats and gloves this week so I thought I would record here my first ever machine made quilt from last spring. Before that I had only made one full sized quilt, and that was done by hand. I saw Kaffe Fassett's quilts at the Life In Colour exhibition in London and I noticed his S quilt.  I did not take any photos myself but there is a great post  on Quilt Candy's blog.


I had this box of Liberty fabrics - not at all like Kaffe's zingy colours but more the sort of thing I thought my daughter would like.  I added one solid in a hyacinth colour which is her favourite.


Construction was very straightforward - the H shapes were built up in 4 inch squares.  I had to be careful not to muddle up the rows so I drew the layout on graph paper. 


I intended to use a sheet for the back of the quilt, but was lucky enough to find a length of an old Liberty print called Hibiscus in a lovely dark navy.  I pieced this with a few leftovers including another favourite, Dragonista.

It was quilted along the seams using an ordinary machine foot as at that stage  I did not own a walking foot.  The quilt inspector found one or two puckers but that's life.


Thursday 17 October 2013

Liberty London Eye

Once again I'm trying to use up some of the Liberty hoard without adding to the pile of finished items that no one wants.  In this project I did manage to use up some of those tiny scraps. (It's against the law to throw them away, right?)


The iris part of the eye is made from 36 tana lawns (not all different, I admit).  I used a paper foundation which I drew in four sections using a protractor and each wedge is 10 degrees.  The paper I used was too thick - I found this out when attempting to remove it - that process almost took longer that the machine sewing.  Much cursing was involved - and tweezers.


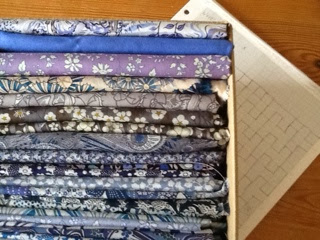
  • The fabrics I used are:
  • Pupil and background:  Liberty Tana Lawn Hibiscus
  • The iris:  More liberty - Glenjade, Pepper, Adelaja, Ianthe, Theberton, Willow Rose, Speckle, Lord Paisley, Millie, Darnley, Lillian's Berries and a few more, some design names unknown to me.
  • The white part of the eye is Jugendstil .


For the back of the cushion I used Layla and Richard.  I bought half a yard of this when it came out (last year?)  I love the retro feel and the London skyline in this one.


For the quilting, I just did a few lines radiating out on the top half of the eye.


The sun just came out so I rushed out but it went in again before I could take a good photo.....  That might be the story for the next few months.  Horrible to think that the clocks go back for winter BST at the end of the month.

Linking up with Crazy Mom for finish it up Friday, and with Lily's Quilts Fresh Sewing Day .

Tuesday 1 October 2013

Liberty Lover's Bag

This is definitely a bag for lovers of Liberty Tana Lawn.  Perhaps a bit OTT but I like it - there are about thirty different Liberty Tana Lawns in this bag.  


 Lining: Small Susanna

Side pockets: Willow Rose

Rear pocket lining:  Strawberry Thief

Binding: Wiltshire

...and many more in the strip of EPP hexagons on the front flap 
and around the magnetic catch under the flap.

The idea was to make this bag without buying anything new apart from the leather strap.  I tried to use Peltex for the first time - it might be the last time.  It stuck on alright, but I found the fabric would not bend without looking creased.  I pulled it out and used layers of vilene interfacing instead. 

I'm pleased with the slip pockets in the side panels.  These should be useful for small items / tickets etc.

This bag's first outing might be to Liberty - why not?

Joining up with Crazy Mom's Friday Finish and with Small Blog Meet, which is a linky for blogs with less than 50 followers hosted by Lily's Quilts


Thursday 19 September 2013

Knitting Season

Is it time for knitting season to start yet?  

There is a chill in the air and I am ignoring demands for the central heating to be put on.  And suddenly it is properly dark at 8 pm.  Could this be the year I will finish the second Sanquhar glove? And find the first one, knitted 6 years ago?

Knitting somehow belongs to Autumn and Winter, and sewing to Spring and Summer.  Sewing, at least with the machine, has to be done indoors.  In the winter it seems illogical to shut yourself away with the machine and the iron and the cutting board while the rest of the family is downstairs watching a film. 

But wait, what about hand sewing?  That can be portable.  This year I have seen so many little bags, boxes and ideas to organise portable patchwork. Here are some:


I can't promise that I won't be knitting this winter. But when the heating goes on, this little tin will be by my chair under the light, so I will always have some patchwork close at hand.


Thursday 12 September 2013

Gameboard Borders?


The gameboard quilt top is now finished...or does it need borders? What do you think?  It is not a very useful size - about 36 inches square at the moment.  I do like things I make to have some use.  The Minick & Simpson pattern it is based on is a wall hanging.  Not sure what I think about wall hangings.  I think I will leave it on the wall as it is while I think about it.  My next project will be something with a definite use.


If I add to this I will need to buy some more fabric!

Linking with Finish it up Friday at Crazy Mom Quilts.

Wednesday 4 September 2013

Liberty Hexagon Pincushion


It's finished!  Fuzz decided it was hers as soon as it was stuffed and started going at it with her claws:


Apols for blurry action shot.  Let me assure you that there were no pins in the cushion at this stage.

Here are a couple of progress pics.  The top and bottom were machine quilted.  If I made another one I would also quilt the sides as Liberty Lawn is so fine.  The tiny hexagon templates were printed out from this website.  I started in the middle and worked outwards until the piece was big enough (about 6 inches across - big enough not to get buried under fabric).  Here's the back with the paper templates still in. 
The back of the patchwork top.

After quilting and sewing together.  The side was a strip 2 inches wide.

This is the underside - the fabric is Speckle


The cushion is stuffed with leftover bits of batting at the moment as I have not yet got my hands on the crushed walnut shells.


Thanks once again to Frances at Fabadashery for the inspiration.


Thursday 29 August 2013

Little and Large

A quick progress report on the English Paper Piecing projects:


The four corner squares of the Gameboard quilt are done.  These finish at 12 inches.  Here they are with their papers still in.  The next step will be to do the four squares which make up the playing area for the game.  I will leave the central "home" square until last. I've been doing some Wiki research on the rules of the American game Parcheesi, and the British game Ludo.  In Parcheesi, the players progress round the board anti-clockwise but in Ludo they go clockwise.  There are loads of variants to both games.  I think I'm going to modify the Minick and Simpson pattern to make it a bit more like our Ludo.


On the tiny front, I've got this far with the Liberty Lawn hexagons. There are sixty-one 3/4 inch hexagons in this 6 1/2 inch piece, which will probably turn into a pin cushion.  I'm hoping it will turn out half as nice as Fabadashery's and have started researching local suppliers of crushed walnut shells for the filling.  It's ruinous to buy it online because the weight makes the postage expensive.

Linking up with Lily's Quilts Small Blog Meet


Wednesday 28 August 2013

Bloglovin

I've started using Bloglovin. Apparently I have to include this link in a new post in order to "claim" my own blog.  Not sure why but here goes. Follow my blog with Bloglovin

Friday 23 August 2013

Game Board Quilt

This book about North American Gameboards was given to me by my sister sometime around 1985, following her visit to the American Folk Art Museum in New York.  


Most of the boards in this book are for Parcheesi, which seems to be similar to the game we call Ludo in the UK. But other games are represented too.


I love these game boards, no doubt for the same reasons that I am drawn to patchwork and any kind of geometrics.  Apparently antique game boards are now keenly collected and go for silly money.  Could I make a game board quilt?  Last week I got all enthusiastic and got as far as drawing a rough plan on graph paper.


But there is nothing new under the sun.  Minick & Simpson have already done it!  

After some muttering I bought their pattern and made a start but could not cope with the curves.  I think I might be able to use the English Paper Piecing method.  It is the biggest EPP I have ever done - the square will finish at 12 inches.  Here's where I got to this week:


Also in the pic you can see some small hexagons.  I started these to use up some of my tiny Liberty Lawn scraps.  Liberty Lawn is perfect for small EPP because it is so fine.  This may become bigger or get used as it is in some small project.

Saturday 17 August 2013

Pets on Quilts Show 2013

Fuzz and Muppet on the Blue Star Quilt

This is Fuzz and Muppet's entry into the Cats on Quilts 2013 competition at LilyPad Quilts.

Fuzz and Muppet are sisters who came to us from Battersea as kittens about 11 years ago.  Both have used up several of their nine lives, but have enough left to spread themselves (and their fur and claw marks) over quilts and fabric around the house. I even made them their own quilts but they prefer human ones, especially works in progress. 

The quilt they are decorating here was my first full size quilt, done by hand over a year, around my (then) full time job.

Thanks to Fabadashery for introducing me to this link up - go and look at her entry!

Friday 16 August 2013

Liberty Hexagon Quilt

The quilt on this postcard was not on display at the Fashion and Textile Museum's recent Kaffe Fassett exhibition.  But we caught sight of it hanging on the wall in a teaching room where a session was going on.  I spent some time trying to find out which of Kaffe's books it was in. 


I thought I could use some Liberty Lawn for this.  I wanted to use the same fabric for all the triangles in the design, so I chose one of my favourites - Cranford, designed by Grayson Perry for Liberty in 2010. Good job I already had some as you can't get hold of this one easily now.  It is the second one from the bottom in this shoe box of liberty lawns.


Later I did find out that the quilt is called My Fair Lady and the designer is Brandon Mably, not Kaffe Fassett. By the time I tracked it down I had worked out my own pattern.  Brandon Mably's design, as it turned out, was done with strips sewn together then cut into triangles which are then pieced into hexagons. Mine was done with a central hexagon with log cabin style strips around.  This was better suited for some of the large scale prints I wanted to use.  The hexagons to 8 inches and added the triangle pieces.  Here are the rows ready to be sewn together.


The quilting is straight line echo around the hexagons.  This brings out the star shapes quite well. 

It went OK with the walking foot until the last few lines of quilting where things started to slide around a bit.  I realised afterwards that the screw holding in my walking foot had worked loose and the foot was about to drop off.  I must admit that I did not go back and unpick the puckered bits and actually they don't show up too much.  Was cross with myself at the time though. Note to self: check that the screw is tight every now and then when using the walking foot.


Thursday 8 August 2013

Typo Bag

I could not resist this funky typewriter fabric while I was visiting Tikki Patchwork.  I had an orange portable when I went off to university in 1972 - just like this one.  How things have moved on.  We are now calling these machines "vintage".


 I also bought this pouch pattern (you can get it online here ). 

 I did not have a plan, but I am thinking about my next large project so I needed something to get on with.  I also wanted to try Paula Doyle's method for piecing smallish squares.  The typewriter fabric would do for the lower striped section, and I found I already had some ice cream coloured solids for the squared section.

Paula Doyle's book Mini Mosaic Quilts has a printed grid which you use to position your squares on lightweight interfacing - this worked rather well although cutting the interfacing and opening up the seams was a bit fidly. And my seams were off - less than 1/4 inch - so the pieced section ended up bigger than the typewriter section.

Here's the finished pouch.  And I still have a bit left from the FQ for another project - might be good for a vintage v.modern iPad case.